Knitting on a budget: DIY notions
Knitting can feel like a ridiculously expensive hobby. I began knitting seriously when I was a uni student with limited disposable income, so I quickly learned that there are ways you can make knitting friendlier to your wallet. In this blog post series on knitting on a budget, I’m going to share what I learned in those early uni days and some extra tips I’ve picked up along the way.
Notions are the knitting supplies with which you can take the most shortcuts and save the most money. Having a drawer full of beautiful, knitting-specific notions can make your heart very happy but your wallet very sad. On the other hand, since we’re all crafters at heart, making your own notions or getting creative with every day items is very satisfying as well. The idea for this whole blog series actually started off because I used to love making my own stitch markers - so in this post I’m going to walk you through how to do that, as well as ways to find alternatives for some other notions and accessories you may need while you’re knitting.
stitch markers
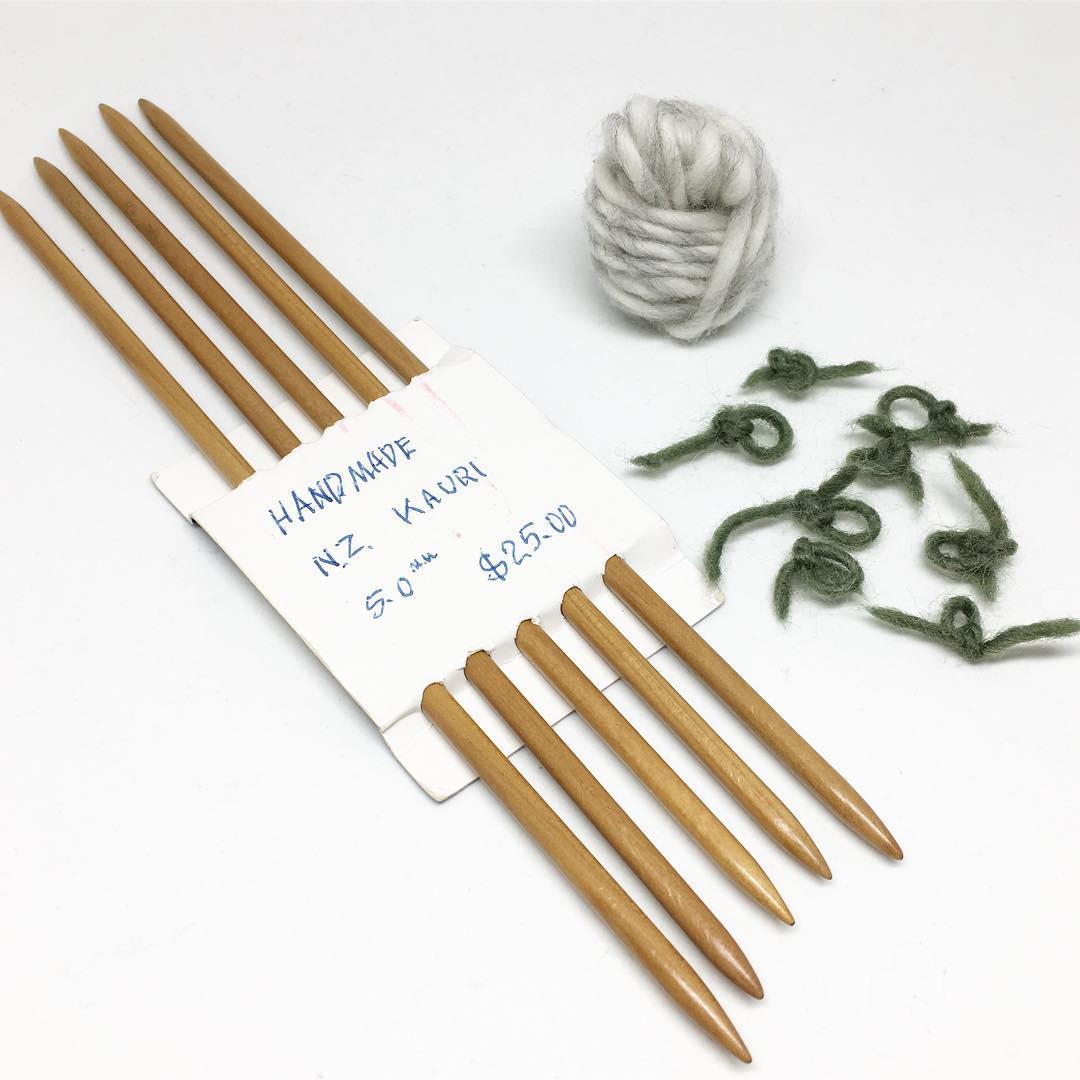
Some little green markers I made for a project. The yarn was quite fuzzy, which wasn’t a great choice. Stick with cotton or acrylic for best results.
The first time I worked with a pattern that needed markers it didn't even occur to me that they were a thing you could buy. I thought they just meant 'mark this spot somehow'. So I started tying lengths of scrap yarn into little loops and boom, DIY markers. It took me until 2017 to actually get some real stitch markers, and to be honest they’re a nicety but I’d still be perfectly happy using my old home made ones.
DIY markers are a great way to use up little bits of your stash, but yarn choice is important. First off, make sure they’re a contrasting colour to your project so that they’re easy to see. You also need to make sure the fibre content is something smooth, not fuzzy, otherwise the fibres in the marker may merge or felt with the yarn you’re using to knit your project. Cotton and acrylic are the best options. If you need to use wool, avoid single ply yarns as they tend to be fuzzier than plied yarns. Whatever you do, don’t use mohair.
Once you’ve chosen your yarn, put both of the needles for your project together and tie a loop of yarn tightly around them, then tie a knot in the top. Trim the ends so you don’t have too much loose yarn dangling off your marker. Rinse and repeat until you have as many as you need for the project!
If you need locking stitch markers, use safety pins. Just be careful that you push them through the stitch - it’s easy to accidentally pierce the yarn with them.
SCISSORS
There are a lot of fancy craft scissors that you can get, but they end up being rather expensive. Because yarn is so thin, you usually don’t need special craft scissors to cut through it. Scissors are the notion that you most likely have lying around your house - just use what you’ve already got. If you do want to have dedicated craft scissors, buy regular scissors from a stationery store and if you make sure no one uses them to cut paper or cardboard they won’t get blunt.
I do have a pair of small embroidery scissors that I bought to travel with since most airport security will let them through if they’re under a certain size. If you don’t want to buy scissors just for this though, make sure to travel with a set of nail clippers in your carry on - they work just fine for cutting yarn.
blocking mats

Blocking a blanket on my blocking mats - since they’re kids playmats they have the added bonus of being lovely and bright.
When I started blocking my projects, I wasn’t invested enough in blocking to actually buy any equipment except for T-pins. When you block, T-pins are the one piece of equipment you shouldn’t skimp on. Blocking always involves some sort of moisture that can cause regular pins to rust, and the last thing you want is rust stains on your project. They’re relatively affordable - you can buy them for sets of 150 for around $6 on Amazon.
Blocking mats, on the other hand, have a whole range of alternatives at different price points. When I started, I was blocking small items so I simply wrapped a cushion in a garbage bag and pinned them to that. Just make sure you don’t use a cushion you care about too much in case the pins ruin it. When I started blocking scarves, I went to Target and bought a cheap yoga mat. The good thing about yoga mats is that the cheaper they are, the thicker they are, and you actually want thicker mats for blocking so that your pins have something to dig in to. If you decide to invest a lot in blocking, you can get foam blocking mats that come in interlocking sets with measurement lines on them to help you pin your edges straight. However, I’ve found that children’s foam playmats are almost exactly the same as real blocking mats, they just don’t have the lines on them so you need to measure the edges out for yourself. This is the route I eventually went. The set I got are from Poco Divo on Amazon.
measuring things
Speaking of measuring your knitting, you’ll most likely need a tape measure. If you’re looking to save on one, big box craft or hardware stores have plain ones for relatively cheap. If you want to go really budget, head to your closest IKEA to get some meatballs for lunch and pocket a few of the paper ones that they provide for people to measure their furniture!
Rulers are also handy to have on hand - for smaller projects, they’re more reliable because they don’t stretch over time. Buying them in the stationery aisle of your local supermarket will net the best bang for your buck.
project bags and notion bags

Some of my favourite project and notion bags - the tote was free from a shop I visited when I lived in Saigon and the zipper pouch was a gift.
While I’ve eventually gotten ‘real’ versions of most of the notions I’ve talked about so far, the one thing I’ve never invested in is special project bags. Over the years I’ve slowly gathered a collection of simple bags that I use as project bags, and I like them so much that I've never felt the need to buy more structured ones. I’ve never paid for any of my project bags. Some were gifts or freebies from events, but at least two or three of them are very small canvas totes that were the packaging for items that I bought.
The best type of project bags are ones that have drawstrings, since you can knit with them while they’re closed. When you pull the drawstring closed it stops your balls of yarn from falling out, but you can thread the yarn through the little hole in the top so you can keep knitting. The most consistent (free) source of these I’ve found has been my yarn orders from LoveCrafts - the yarn always comes packaged in these nice see through drawstring bags that you can then use for your projects.
If you need small bags to keep your notions in, I’ve found that little zipper pouches work really well. I have no idea how I’ve amassed such a collection of them over they years but they seem to be the sort of things that aunties like to give you at Christmas. If you manage to get some make sure to hold on to them so you have somewhere to toss your stitch markers and scissors into when you’re on the go!
That’s it for my tips on notions. Do you have other notions that you like to make yourself, or substitute with every day items? Let me know in the comments below!
This post contains affiliate links - buying from sites using these links doesn’t affect the price you pay for products, but it helps me out a little.